
The MedicAir® 2.0 apps
Jump to: MedicAir | MedicAir Data | Troubleshooting Guide
There are two apps for the MedicAir® 2.0 system “MedicAir” and MedicAir Data”

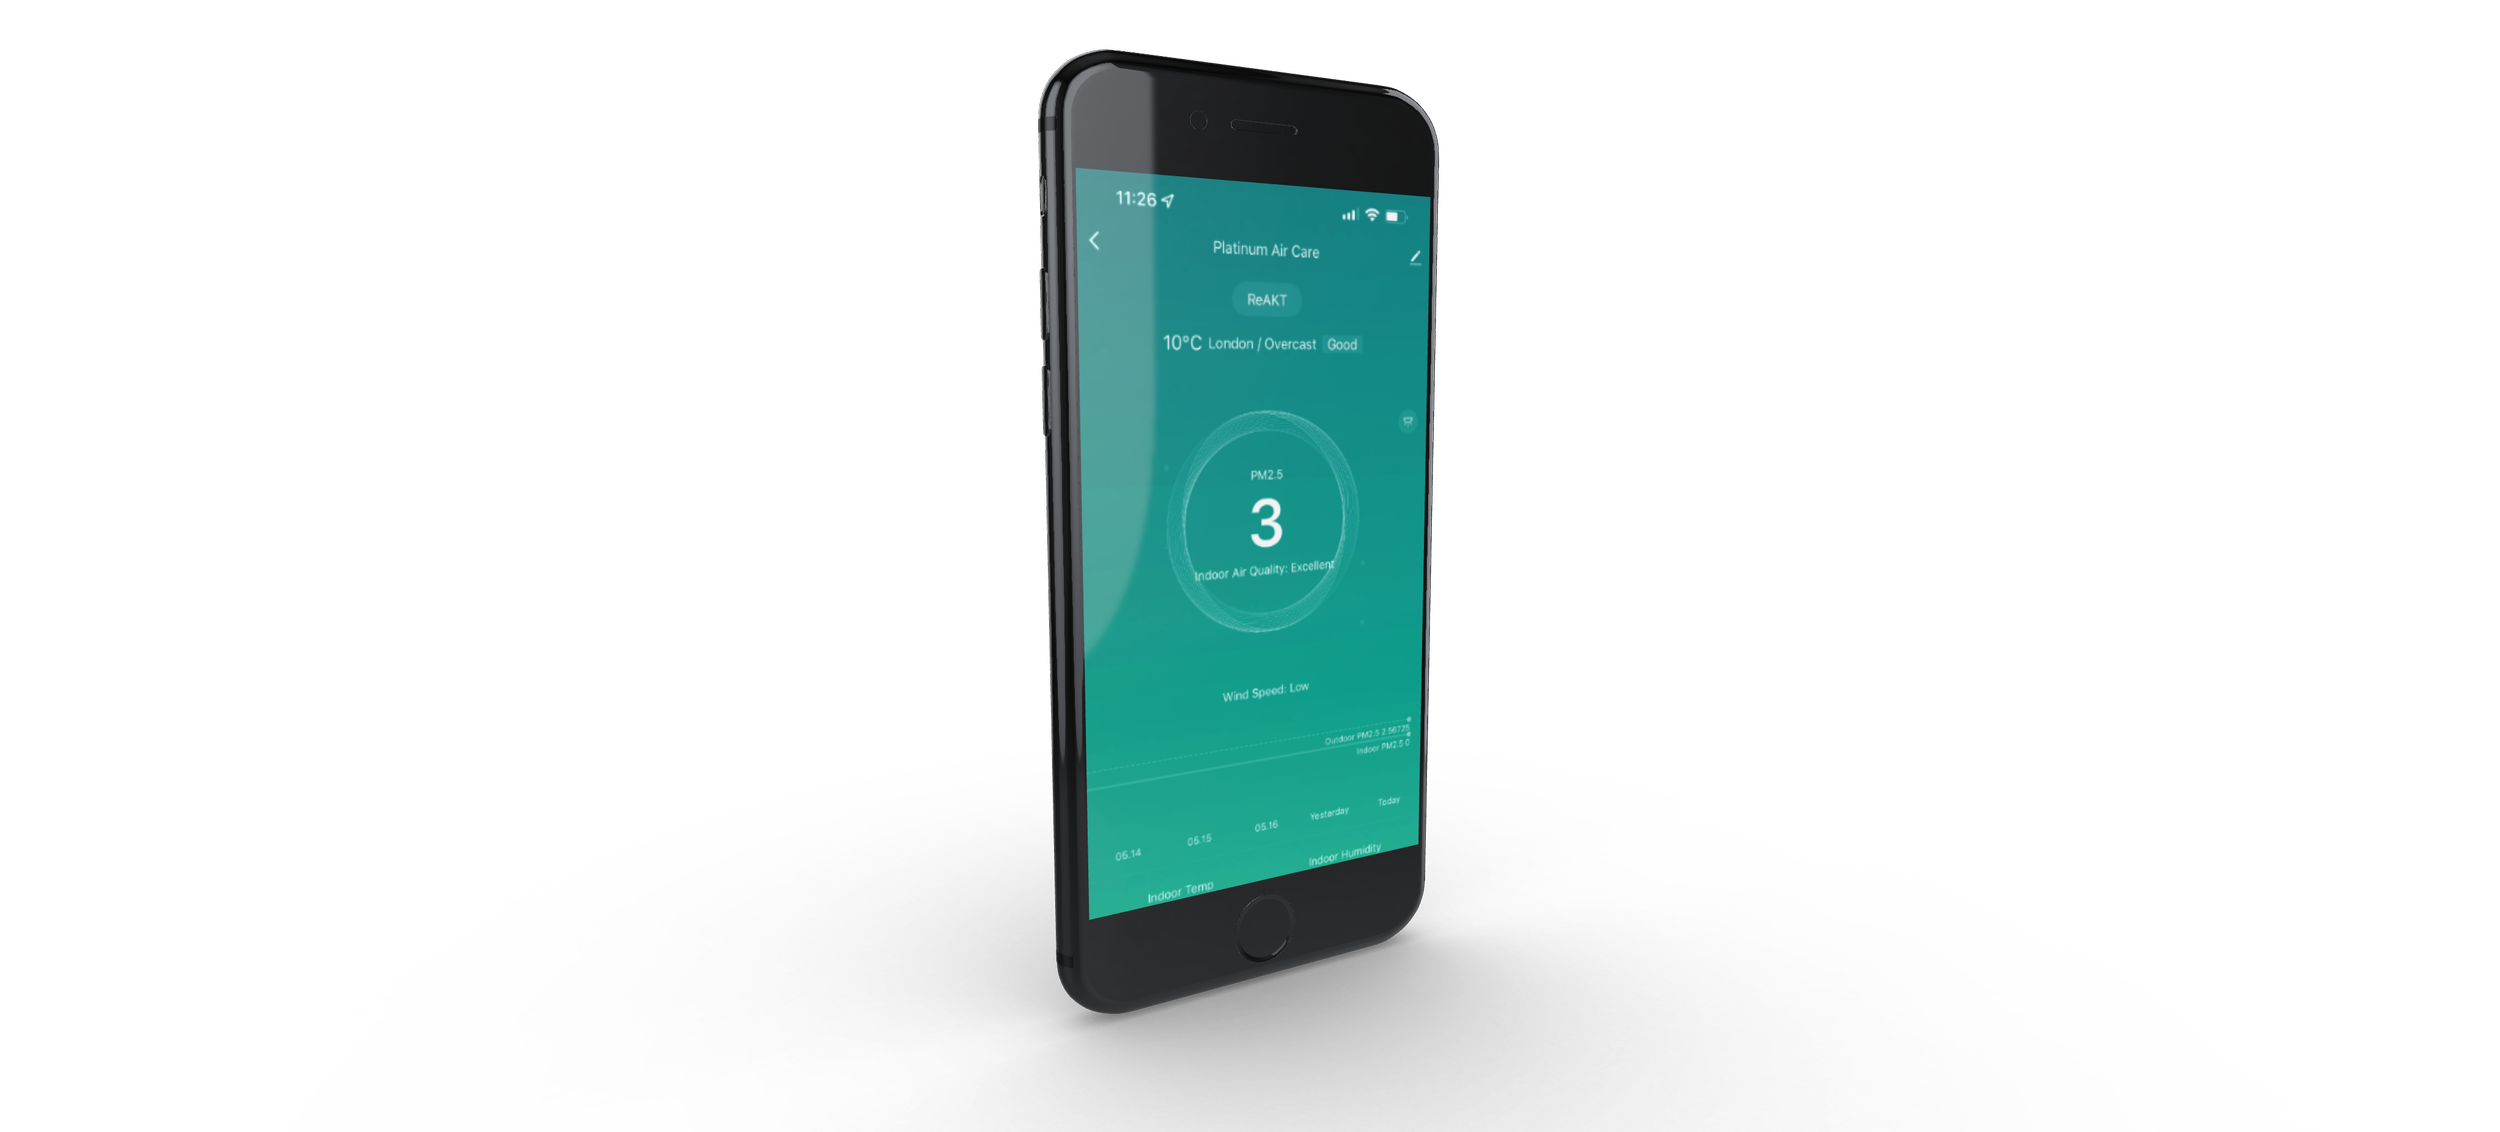
“MedicAir” is used for unit control, viewing air quality levels, and checking remaining filter life.
“MedicAir Data” is used for viewing the air quality history. You can view the data by day, week, month, and year, as well as export the data to an email address.
Both apps are capable of viewing and controlling multiple MedicAir® air purifier units.
Setting up the MedicAir® 2.0 app
For first-time set-up, you will start with the “MedicAir” app.

Step 1: Download the MedicAir App
To download the app, go to your smartphone’s app store and search “MedicAir”.
You can also download the apps by clicking these links:
Step 2: Write down the SSID (Wi-Fi Name) and Wi-Fi password
You will need to know the SSID and password of the Wi-Fi when setting up the app. This allows the MedicAir® 2.0 to directly connect to your home or business Wi-Fi and allows cloud control.
Important: Make sure the information is spelled correctly and is case sensitive. If the Wi-Fi has two SSIDs (two names to connect to), choose the 2.4GHz version.
If you are unsure of the Wi-Fi name, try using your phone to scan for available networks, and choose the closest one available.
If you are unsure of the Wi-Fi password, and if the password was not changed, check the internet box, internet modem, and internet router. You will find the default password on this unit.
This step is important, and you will not be able to complete setting up the MedicAir apps without knowing the Wi-Fi information.
Step 3: Launch the MedicAir App
You or the customer will need to create a MedicAir account. Just type in your email address and you will be sent a verification code. Check your email to receive the code and enter the information given.
If you did not receive the code:
Give it a few minutes, sometimes the email is delayed
Check your spam email
Double-check if you have spelled your email address correctly.
After you have entered the verification code you will be prompted to enter your password.
Next, accept all requests your phone may ask, such as the following:
To send you notifications
To find and connect to devices on your local network (Select Allow / Ok / Accept)
To use Bluetooth (Select Allow / Ok / Accept)
To use your location (Select Allow or Allow while using the app)
Step 4: Connecting MedicAir to Wi-Fi
The next step is to add a device. Press the “Add Device” button or look for a gray plus icon (+). After doing so, you should see an icon labeled “Air Purifier”, select that button.
From here, you will be asked to enter the Wi-Fi network and password. After entering the Wi-Fi information, press “Next”
Now the app will ask you to “Reset the device first.” (Put the MedicAir® into Wi-Fi pairing mode). Turn your attention to the air purifier.
There are two methods of putting the MedicAir® into Wi-Fi pairing mode.
Using the included remote control, point it at the MedicAir® and press the Wi-Fi button on the remote twice.
With the first press, you will hear a sound and notice the Wi-Fi symbol on the MedicAir® flash slowly.
With the second press, you will again hear a sound and notice the Wi-Fi symbol flash rapidly. You are now ready to proceed with the app.
On the MedicAir® unit directly, if the unit is on, turn it off. Now turn the MedicAir® on and allow the unit to boot up (you will know the unit has finished booting up when the blinking lights have become solid). Press and hold the Wi-Fi icon on the unit for 3 seconds, you should hear a chime when it has entered pairing mode. You are now ready to proceed with the app.
Now that the MedicAir has been put into Wi-Fi pairing mode, bring your attention back to the MedicAir app and select “Finish network configuration”, and press “Next”.
Your MedicAir® is now being connected to the Wi-Fi, and you will see a percentage counter going up to 100%.
After this, you should see that your MedicAir has been added successfully.
Step 5: Using the MedicAir app
As mentioned previously, the MedicAir app is designed for controlling the MedicAir and viewing the information displayed on the unit itself, but at the convenience of your smartphone device.
Setting up the MedicAir® Data app
Now that you have the MedicAir app working, you can set up the MedicAir Data App.
To set up the MedicAir Data app, you must have the first MedicAir app set up and working.

Step 1: Download the MedicAir Data App
To download the app, go to your smartphone’s app store and search “MedicAir Data”.
You can also download the apps by clicking these links:
Troubleshooting Guide (Coming Soon)
If you need help setting up the app in Canada. Reach out to us directly and we will be happy to help!